Wall push-ups have become an exercise I truly appreciate after giving them a try over time as a senior. While I may not have perfected the art just yet, the principles behind them have proven incredibly helpful in building strength, improving balance, and supporting overall fitness. They’re gentle on the joints but still effective, making them a great option for anyone looking to boost their health. With that in mind, I decided to share the article I researched and wrote, hoping it can offer you valuable insights on how this simple exercise can support your fitness journey. I encourage you to read through to the end—you might just find a new, beneficial addition to your routine.
Wall Push-Ups: Your New Fitness Buddy for Building Strength and Improving Posture
Wall push-ups are a great way to build upper body strength without putting too much stress on your joints. They’re perfect for beginners or anyone looking for a low-impact workout option.
Wall push-ups target your chest, shoulders, and arms, helping you tone and strengthen these key muscle groups.

You can do wall push-ups almost anywhere, making them a convenient exercise choice. They’re easy to fit into your daily routine, whether you’re at home, work, or traveling.
Plus, wall push-ups are a good starting point if you want to work up to regular floor push-ups.
By doing wall push-ups regularly, you can improve your posture and balance. They also help build core strength, which is important for everyday activities.
Give wall push-ups a try and see how they can boost your fitness journey.

Key Takeaways
- Wall push-ups are a low-impact exercise that builds upper body strength
- You can do wall push-ups anywhere, making them a convenient workout option
- Regular practice improves posture, balance, and core strength
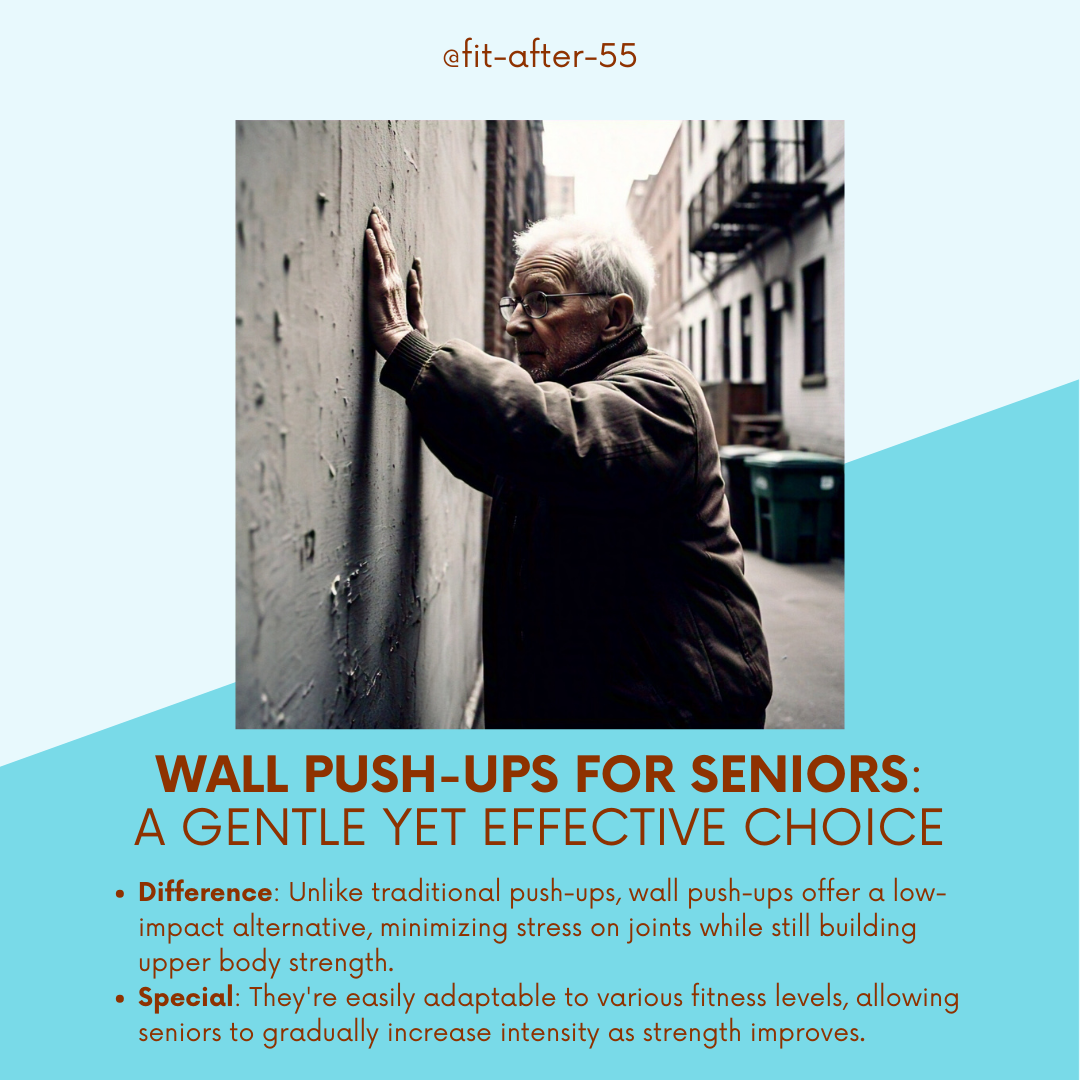
Benefits of Wall Push-Ups
Wall push-ups offer several advantages for building upper body strength and fitness. They’re a great option for people of all fitness levels looking to improve their chest, arm, and shoulder muscles.

Improving Upper Body Strength
Wall push-ups target key muscle groups in your upper body. They work your chest, shoulders, triceps, and core. By doing wall push-ups regularly, you can build strength in these areas.
As you get stronger, you can increase the challenge by moving your feet farther from the wall. This changes the angle and makes the exercise harder.
You can also try different hand positions to target specific muscles.
Wall push-ups are a good starting point if you’re new to strength training. They help you build the strength needed for floor push-ups later on.
Enhancing Muscle Endurance
Wall push-ups are great for building muscle endurance. You can do more reps of wall push-ups compared to regular push-ups. This helps your muscles get used to working for longer periods.
Try doing sets of 10-15 wall push-ups at first. As you get stronger, increase the number of reps or sets.
This gradual increase helps improve your muscular endurance over time.
You can also mix up your routine by doing wall push-ups faster or slower. This variety keeps your muscles challenged and helps prevent boredom.
Low-Impact Nature for Joint Health
Wall push-ups are easier on your joints than floor push-ups. They put less stress on your wrists, elbows, and shoulders.
This makes them a good choice if you have joint pain or injuries.
The upright position in wall push-ups also reduces strain on your lower back. This is helpful if you have back problems or are recovering from an injury.
Wall push-ups are a safe option for older adults or those new to exercise. They let you build strength without risking falls or putting too much pressure on your joints.
Anatomy of a Wall Push-Up
Wall push-ups work your chest, shoulders, and arms. Proper form is key to get the most out of this exercise and avoid injury.

Proper Hand Placement
Place your hands on the wall at shoulder height. Keep them slightly wider than shoulder-width apart. Your fingers should point up toward the ceiling.
Make sure your palms are flat against the wall. This gives you a stable base to push from.
Avoid placing your hands too high or too low. If they’re too high, you’ll work your shoulders more than your chest. If they’re too low, you’ll put extra strain on your wrists.
Body Alignment
Start with your feet about arm’s length from the wall. Stand tall with your body in a straight line from head to heels.
Keep your core tight and your glutes squeezed. This helps protect your lower back.
As you lean in, your body should form a straight line. Don’t let your hips sag or stick out.
Keep your head in line with your spine. Look slightly down at the wall, not at your feet.
When you push back, don’t lock your elbows. Keep a slight bend to protect your joints.
Joint-Friendly Strength Building
Wall push-ups are a joint-friendly exercise that builds upper body strength while reducing strain on wrists and shoulders—ideal for seniors and those with arthritis.
Step-by-Step Guide

Wall push-ups are simple to do and great for building upper body strength. Follow these steps to perform them safely and effectively.
Starting Position
Stand facing a wall about arm’s length away. Place your palms flat against the wall at shoulder height and shoulder-width apart. Your fingers should point up. Keep your feet hip-width apart.
Engage your core muscles to keep your body straight. Lean forward slightly, bringing your body closer to the wall. Your weight should be on the balls of your feet.
Make sure your head, neck, and spine are in a neutral position. Look straight ahead at the wall.
The Downward Movement
Slowly bend your elbows, lowering your chest toward the wall. Keep your body in a straight line from head to heels. Don’t let your hips sag or stick out.
Lower yourself until your nose nearly touches the wall. If this is too hard, stop when your elbows are at a 90-degree angle.
Pause briefly at the bottom of the movement. Focus on keeping your muscles tight and your body stable.
The Push-Up
Push your body away from the wall by straightening your arms. Use your chest and arm muscles to do the work. Keep your core tight throughout the movement.
Push until your arms are fully extended, but don’t lock your elbows. Squeeze your chest muscles at the top of the push-up.
Repeat this motion for your desired number of repetitions. Aim for 10-15 reps to start, then build up as you get stronger.
Breathing Technique
Proper breathing helps you get the most out of your wall push-ups. It keeps your muscles supplied with oxygen and helps you maintain good form.
Breathe in as you lower your body toward the wall. This helps you brace your core and maintain stability.
Breathe out as you push away from the wall. This helps you generate more power in the upward movement.
Try to time your breaths with your movements. Keep your breathing steady and controlled throughout the exercise.
Modifications for Different Fitness Levels

Wall push-ups can be adjusted to fit any fitness level. You can make them easier or harder depending on your strength and goals. Here are some ways to modify wall push-ups for beginners, intermediate exercisers, and advanced fitness enthusiasts.
Beginner Modifications
If you’re new to wall push-ups, start with these easier versions:
- Stand closer to the wall. This reduces the angle and makes the exercise less challenging.
- Do fewer repetitions. Start with 5-10 push-ups and work your way up.
- Take breaks between sets. Rest for 30-60 seconds after each set.
- Use a countertop or desk instead of a wall. This gives you more support.
Try these modifications until you feel comfortable with the basic move. Then, you can slowly make the exercise harder as you get stronger.
Intermediate Variations
Ready to step it up? Try these options to increase the difficulty:
- Stand farther from the wall. This increases the angle and makes your muscles work harder.
- Do more repetitions. Aim for 15-20 push-ups per set.
- Add pauses. Hold the “down” position for 2-3 seconds before pushing back up.
- Try different hand positions. Place your hands wider apart or closer together.
These changes will help you build more strength and endurance. Mix them up to keep your workouts interesting and challenging.
Advanced Techniques
For a real challenge, give these advanced versions a shot:
- Use one arm. This tests your balance and doubles the work for each arm.
- Add a clap. Push off the wall hard enough to clap your hands before landing back on the wall.
- Incorporate plyometrics. Do explosive push-offs from the wall.
- Use unstable surfaces. Place your hands on medicine balls against the wall.
These techniques require more strength and control. Always warm up first and listen to your body to avoid injury.
Enhance Balance and Mobility Safely
This low-impact exercise improves muscle tone and balance, helping reduce the risk of falls while supporting overall upper body mobility.
Common Mistakes and How to Avoid Them
When doing wall push-ups, watch out for a few key errors that can reduce the exercise’s benefits and raise injury risk. Fixing these issues will help you get the most out of this workout.

Elbow Flare
Your elbows should stay close to your body during wall push-ups. Letting them flare out to the sides is a common mistake.
To fix this:
- Keep your elbows at about a 45-degree angle to your torso
- Think about tucking your elbows in as you push
- Check your form in a mirror or ask someone to watch you
Proper elbow position helps target your chest muscles better and puts less stress on your shoulders. It may feel odd at first, but with practice, it will become natural.
Incomplete Range of Motion
Not going through the full motion limits the exercise’s benefits. Some people don’t lean in close enough to the wall or push back far enough.
To get the full range:
- Start with your nose almost touching the wall
- Push back until your arms are straight but not locked
- Control the movement both ways
This full motion works your muscles more and builds better strength. Go slowly at first to make sure you’re doing it right.

Poor Posture
Bad posture during wall push-ups can strain your back and neck. It also makes the exercise less effective.
To keep good form:
- Keep your body in a straight line from head to heels
- Don’t let your hips sag or stick out
- Look straight ahead, not up or down
- Tighten your core muscles
Good posture helps you work the right muscles and avoid pain. It might help to imagine a string pulling the top of your head up toward the ceiling.
Incorporating Wall Push-Ups Into Your Routine

Wall push-ups are a great way to build upper body strength. You can easily add them to your workout plan in different ways. They work well with other exercises too.
As Part of a Circuit Training
Circuit training is a fun way to mix wall push-ups into your routine. Set up 4-6 stations with different exercises. Do wall push-ups at one station for 30-60 seconds. Then move to the next exercise.
Here’s a sample circuit:
- Wall push-ups
- Squats
- Jumping jacks
- Lunges
- Plank hold
Repeat this circuit 2-3 times. Rest for 1-2 minutes between rounds. This gives you a full-body workout that includes your wall push-ups.
Combining With Other Exercises
You can pair wall push-ups with other moves for a targeted upper body workout. Try doing a set of wall push-ups right after a set of bicep curls. This works different muscles in your arms.
Another option is to do wall push-ups between sets of other exercises. For example:
- Do a set of shoulder presses
- Do 10 wall push-ups
- Rest for 30 seconds
- Repeat
This keeps your heart rate up and adds extra upper body work to your routine. You can also use wall push-ups as a warm-up before other chest or arm exercises.
Safety Precautions and Tips
Wall push-ups are generally safe, but taking proper precautions helps prevent injury. Warming up, listening to your body, and cooling down are key steps for a safe and effective workout.
Warming Up
Before starting wall push-ups, warm up your muscles. This gets your body ready for exercise. Try these simple warm-up moves:
- Arm circles: Make small circles with your arms for 30 seconds
- Shoulder rolls: Roll your shoulders forward and backward 10 times each
- Wrist rotations: Rotate your wrists in circles 10 times each direction
A 5-minute walk or march in place can also help warm up your whole body. Warming up increases blood flow and flexibility, reducing the risk of strain or injury.
Listening to Your Body
Pay attention to how you feel during wall push-ups. Stop if you experience:
- Sharp pain in your shoulders, arms, or chest
- Dizziness or lightheadedness
- Extreme fatigue or breathlessness
Start with a few repetitions and gradually increase as you get stronger. If you have existing injuries or health concerns, check with your doctor before starting.
Take breaks when needed. It’s better to do fewer push-ups with good form than many with poor technique.
Cooling Down
After your wall push-ups, cool down to help your body recover. Try these simple cool-down exercises:
- Gentle arm stretches: Hold each stretch for 15-30 seconds
- Deep breathing: Take 5-10 slow, deep breaths
- Light walking: Walk around for 2-3 minutes
Cooling down helps your heart rate return to normal. It may also reduce muscle soreness. Drink water after your workout to stay hydrated.
Remember to listen to your body during the cool-down too. If you feel dizzy or unwell, sit down and rest until you feel better.
Tracking Progress with Wall Push-Ups
Keeping tabs on your wall push-up journey helps you stay motivated and see how far you’ve come. It’s important to set goals and record your workouts to make steady gains.
Setting Realistic Goals
Start by figuring out where you’re at now with wall push-ups. Can you do 5 in a row? Or maybe 20? Write down your starting point.
Next, pick a goal that’s a bit of a stretch but not impossible. You might aim to add 5 more push-ups to your max in a month.
Break your big goal into smaller weekly targets. This could mean adding one extra push-up each week.
Don’t forget to celebrate small wins along the way! Each time you hit a mini-goal, give yourself a pat on the back.
Recording Workouts
Get a notebook or use your phone to log your wall push-ups. Write down the date, how many sets you did, and how many push-ups in each set.
Note how you felt during the workout. Were the push-ups easy? Hard? This info helps you adjust your plan.
Try timing your sets to track speed improvements. You might see you can do the same number faster over time.
Take progress photos every few weeks. Seeing changes in your arm and chest muscles can be super motivating.
Look back at your log often. It’s a great way to see how far you’ve come and stay pumped up about your progress.
Supplementary Exercises for Optimal Results

Wall push-ups are great, but adding other exercises can boost your upper body strength even more. Try these simple moves to round out your routine:
Arm circles: Stand with your arms out to the sides. Make small circles, then gradually increase the size. Do 10 circles forward and 10 backward.
Shoulder shrugs: Stand up straight and lift your shoulders towards your ears. Hold for a few seconds, then lower. Repeat 10-15 times.
Doorway stretches: Stand in an open doorway with your arms on the frame. Lean forward slightly to feel a stretch in your chest. Hold for 15-30 seconds.
Wall slides: Stand with your back against a wall. Slowly slide your arms up the wall, then back down. Repeat 10-15 times.
Here’s a quick workout plan you can try:
- Wall push-ups: 3 sets of 10
- Arm circles: 2 sets of 10 in each direction
- Shoulder shrugs: 2 sets of 15
- Doorway stretches: 3 sets of 15-30 seconds
- Wall slides: 2 sets of 10
Remember to warm up before exercising and cool down after. Start with what feels comfortable and slowly increase as you get stronger. You’ve got this!

Wrapping Up with Wall Push-Ups: A Step Toward Strength and Balance
Thank you for reading through this article! I hope you’ve found the information helpful as you consider adding wall push-ups to your routine. We’ve covered how they can improve strength, balance, and joint health, along with tips on form and modifications for different fitness levels. Whether you’re just starting or looking for a way to mix up your workouts, wall push-ups can be a great choice.

So, have you decided to give them a try? I encourage you to take it slow, listen to your body, and make sure you’re staying safe. If you have any doubts or concerns about adding them to your routine, don’t hesitate to check in with a medical professional or fitness expert. Wishing you all the best on your fitness journey—stay safe and keep moving forward!
Frequently Asked Questions

Wall push-ups are a great low-impact exercise for building upper body strength. They offer many benefits and can be done safely with proper form. Here are some common questions about wall push-ups:
What are the benefits of doing wall push-ups regularly?
Wall push-ups help build strength in your chest, shoulders, and arms. They can improve your posture and core stability. Regular practice also boosts your endurance and can help prevent injuries.
How can I correctly perform a wall push-up to avoid injury?
Stand arm’s length from a wall. Place your palms flat against it at shoulder height. Keep your body straight as you lean in, bending your elbows. Push back to the starting position. Keep your core tight and breathe steadily throughout the movement.
Are wall push-ups a good option for beginners wanting to build upper body strength?
Yes! Wall push-ups are perfect for beginners. They’re easier than floor push-ups but still work your upper body muscles. You can control the intensity by changing your distance from the wall.
How many repetitions of wall push-ups should I start with as a beginner?
Start with 5-10 repetitions. Do 2-3 sets with rest in between. As you get stronger, increase the number of reps. Aim for 3 sets of 15-20 reps before moving to a more challenging variation.
Can wall push-ups help in improving posture? If so, how?
Wall push-ups can improve your posture. They strengthen your chest, shoulders, and back muscles. This helps you stand taller and reduces slouching. Focus on keeping your body straight during the exercise to get the most benefit.
What variations of wall push-ups can I try to target different muscle groups?
Try one-arm wall push-ups to work each side separately. For more challenge, do incline push-ups with your hands on a lower surface. Use a stability ball against the wall to engage your core more. You can also do wall push-ups with your feet elevated to target your upper chest.
Join Our Community for Senior Fitness Support!
Ready to take your fitness journey further? Visit our official site at Fit After 55 for engaging content, helpful product reviews, and expert tips on staying fit at any age. Don’t forget to connect with us on our Facebook page to join a supportive community of fitness enthusiasts who are all about encouraging each other, especially for seniors. We’d love to have you be part of the conversation!

